
How to Set Up DKIM: A Complete Step-by-Step Guide
Find your email provider’s DKIM selector, publish its public key and verify the signature on a delivered test message.
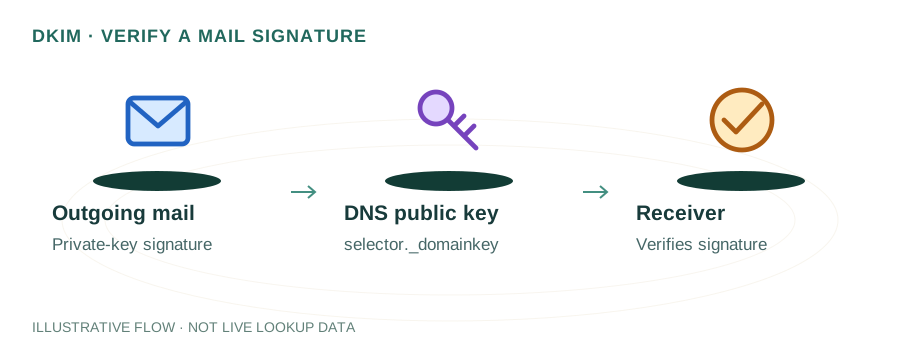
The named scenario below is a worked example for learning, not a verified incident report. Provider settings and outcomes vary.
DKIM Setup Workflow
Create public/private pair
Add TXT record
Enable DKIM signing
Server signs headers
Checks DNS for key
Signature validated
🎯 Illustrative example: Ananya Sets Up DKIM for Google Workspace
Ananya's marketing emails fail DKIM checks. She needs to set up DKIM for her Google Workspace domain:
Generates DKIM key in Google Admin
Goes to Apps → Gmail → Authenticate email. Google generates a 2048-bit DKIM key pair.
Gets the DNS record value
Google gives her a TXT record: name = google._domainkey, value = v=DKIM1; k=rsa; p=MIIBIjAN... (long public key).
Adds TXT record to DNS
Creates TXT record at google._domainkey.ananya.com with the public key value.
Waits for DNS propagation
TTL is 3600 (1 hour). She waits 2 hours to be safe, then clicks 'Start Authentication' in Google Admin.
Sends test email
Sends email to a Gmail address. Checks headers — sees 'dkim=pass header.d=ananya.com'. It works!
DKIM active for all users
Every email from @ananya.com now carries a valid DKIM signature. DMARC alignment also passes.
DKIM pass rate goes from 0% to 100%. Email deliverability improves significantly.
Common mistake: copying the key with extra spaces or line breaks — causes DKIM to fail.
What is DKIM?
DKIM (DomainKeys Identified Mail) is an email authentication standard that uses public-key cryptography to verify that an email was sent by the domain it claims to be from and that the message body hasn't been altered in transit.
When you send an email, your mail server signs the message headers and body with a private key. The receiving server looks up the corresponding public key in your domain's DNS TXT record and verifies the signature. If it matches, the email passes DKIM authentication.
How DKIM Works: The Signing Process
Step 1: Generate Key Pair
Your mail server or email provider generates a public/private RSA key pair (typically 1024-bit or 2048-bit). The private key stays on the mail server; the public key goes into DNS.
Step 2: Sign Outgoing Email
When an email is sent, the server creates a hash of specified headers and the message body, then encrypts it with the private key. This signature is added as a DKIM-Signature header.
Step 3: Receiver Verifies
The receiving mail server extracts the selector and domain from the DKIM-Signature header, looks up the public key via DNS (selector._domainkey.yourdomain.com), and verifies the signature.
Step 4: Pass or Fail
If the signature is valid, DKIM passes. If the message was altered or the key doesn't match, DKIM fails — and the DMARC policy determines what happens next.
DKIM DNS Record Format
The DKIM public key is published as a TXT record in DNS. The record name follows a specific format:
selector._domainkey.yourdomain.comThe selector is a unique identifier (like "google" or "s1") that allows multiple DKIM keys per domain.
Example DKIM TXT record value:
v=DKIM1; k=rsa; p=MIIBIjANBgkqhkiG9w0BAQEFAAOCAQ8AMIIBCgKCAQEA...
v=DKIM1k=rsap=...DKIM Setup by Provider
Google Workspace (Gmail)
- Go to Admin Console → Apps → Google Workspace → Gmail → Authenticate email
- Select your domain and click Generate new record
- Choose 2048-bit key length and a prefix selector (default: "google")
- Copy the TXT record value and add it to your DNS as:
google._domainkey.yourdomain.com - Wait for DNS propagation (up to 48h), then click Start authentication
Microsoft 365 (Outlook)
- Go to Microsoft 365 Defender → Email & collaboration → Policies → DKIM
- Select your domain — Microsoft will show two CNAME records to add
- Add the CNAME records to your DNS (selector1 and selector2)
- After propagation, toggle DKIM signing to Enabled
Custom Mail Server (OpenDKIM)
- Install OpenDKIM:
sudo apt install opendkim opendkim-tools - Generate keys:
opendkim-genkey -s mail -d yourdomain.com - This creates
mail.private(private key) andmail.txt(DNS record) - Add the contents of mail.txt as a TXT record at
mail._domainkey.yourdomain.com - Configure Postfix to use OpenDKIM as a milter
Verifying Your DKIM Setup
After publishing the DNS record, verify it's correctly configured:
Using dig
dig TXT google._domainkey.yourdomain.com +short
Using nslookup
nslookup -type=TXT google._domainkey.yourdomain.com
Check email headers
Send a test email and check the received headers. Look for dkim=pass in the Authentication-Results header.
Use mydnsreport.com
Use our DNS Lookup tool to check your domain's TXT records and verify the DKIM key is published correctly.
Common DKIM Mistakes
Using 1024-bit keys — Upgrade to 2048-bit. Many providers now require it and 1024-bit keys are considered weak.
Line breaks in DNS record — Some DNS providers require the TXT value in a single string. Remove line breaks if DKIM fails.
Wrong selector name — The selector in DNS must match exactly what your mail server uses in the DKIM-Signature header.
Not rotating keys — Rotate DKIM keys every 6-12 months. Add the new key before removing the old one to avoid downtime.
Missing DMARC alignment — DKIM alone isn't enough. Set up SPF and DMARC for full email authentication.
Frequently Asked Questions
What is DKIM and why do I need it?
DKIM uses public-key cryptography to sign outgoing emails, proving they came from your domain and weren't modified in transit. It's essential for email deliverability and preventing spoofing.
How long does DKIM take to start working?
After publishing the DNS record, allow 15 minutes to 48 hours for propagation. Most providers see it active within 1-2 hours.
Can I have multiple DKIM keys?
Yes! Each key uses a different selector. This is useful when you have multiple email services (e.g., Google Workspace + SendGrid) or during key rotation.
Related Articles & Tools
Why Emails Go to Spam
Fix email deliverability with SPF, DKIM, and DMARC
Email Authentication Guide
Complete SPF, DKIM, DMARC setup guide
DNS Lookup Tool
Check your domain's TXT and DKIM records
SPF Too Many Lookups
Fix the SPF 10-lookup limit error